Flare Testing Raw Data
Colors used in tables and graphs
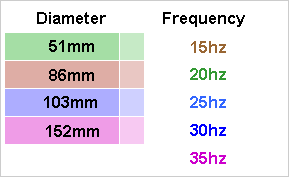
Background = port diameter, Foreground = frequency
Background = port diameter, Foreground = frequency
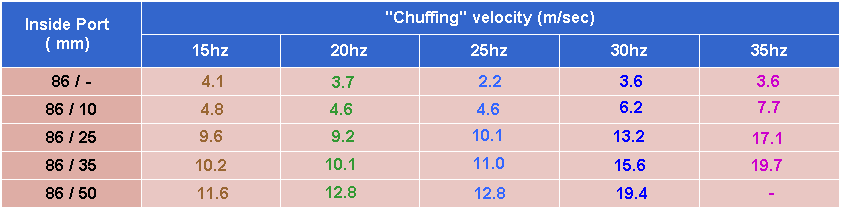
Round one - 50 litre twin driver box 240w
Calculated Power = ( Voltage squared ) / 7
The 51/10 port was only tested at 30hz because it was difficult to get a consistent result. If accurate data is required for this diameter, a series of ports with larger flares would be required. There are no plans for this at the moment.
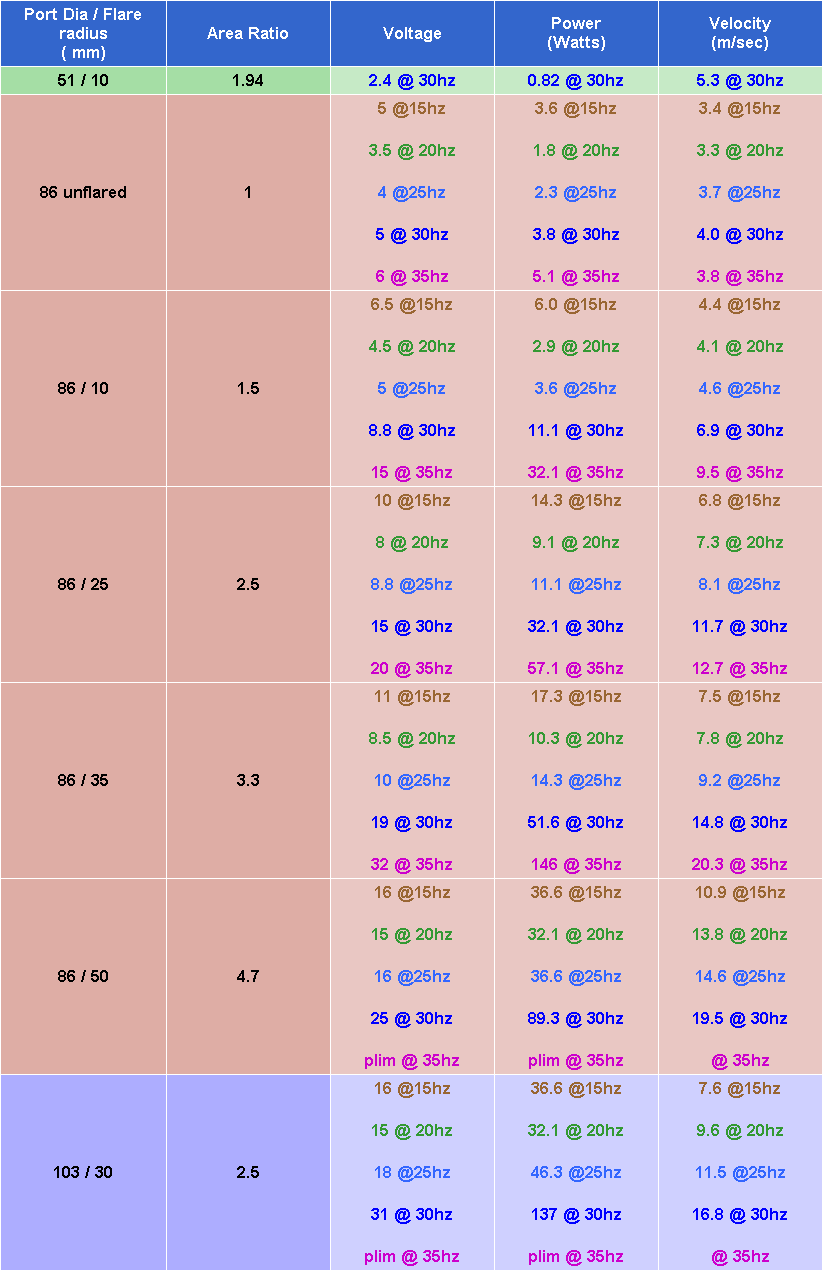
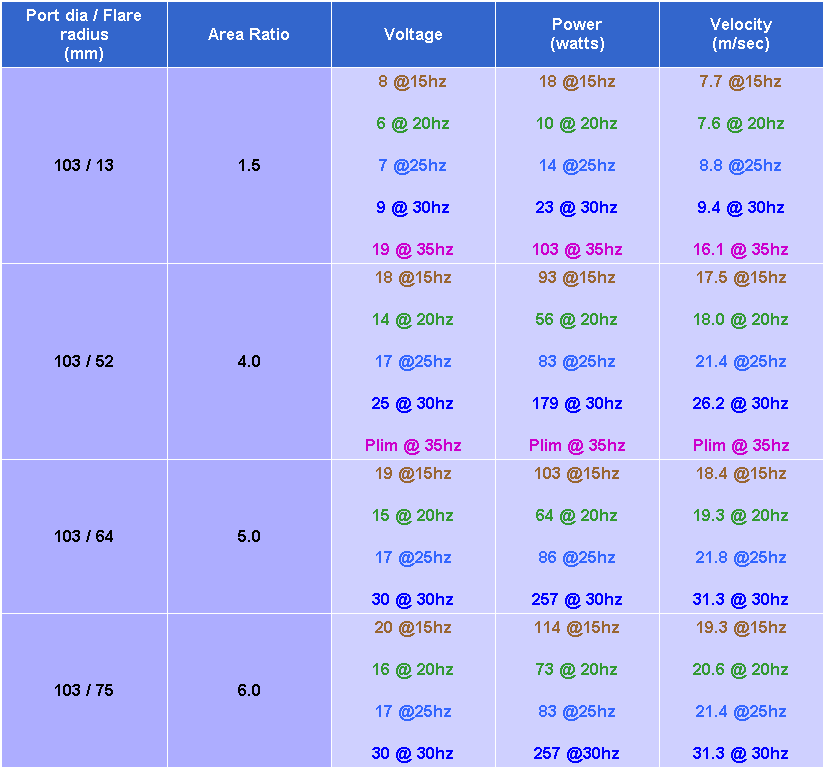
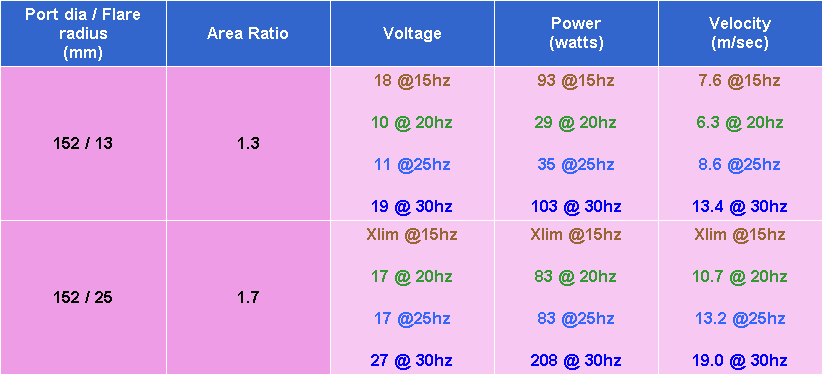
Round two - Variable volume quad driver box 350w
Calculated Power = ( Voltage squared ) / 3.5
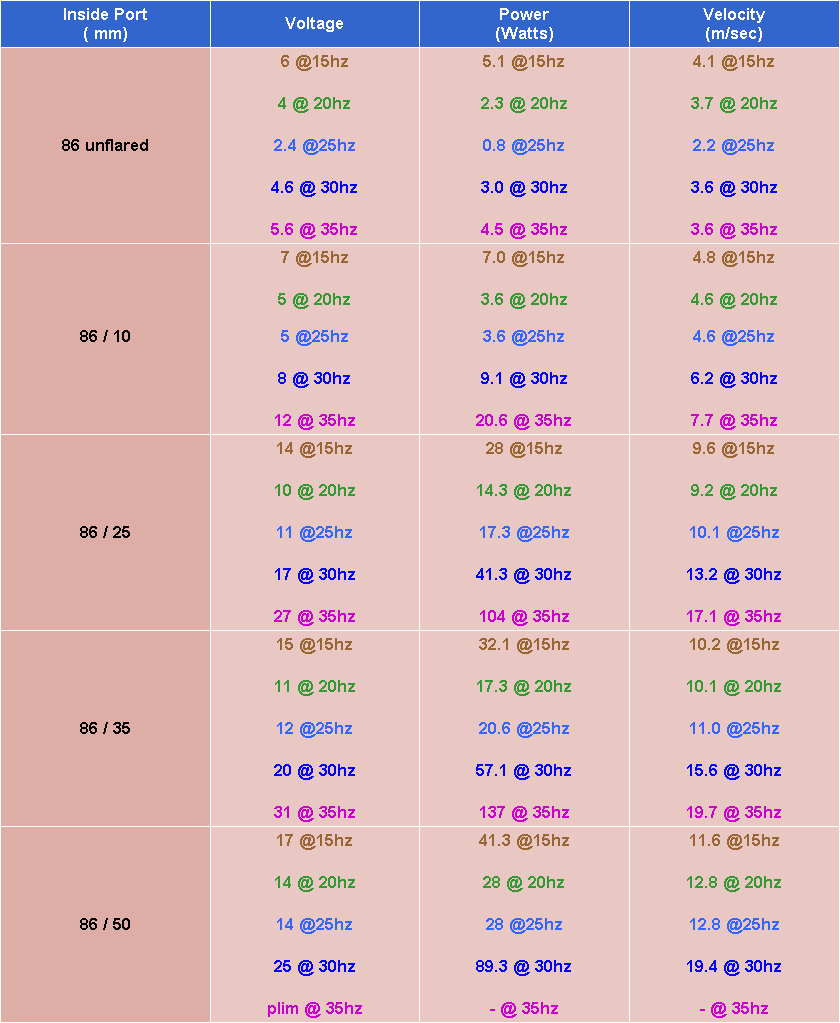
86mm ports tested in 70 Litre Box

103mm ports tested in 100 Litre Box
152mm ports tested in 160 Litre Box
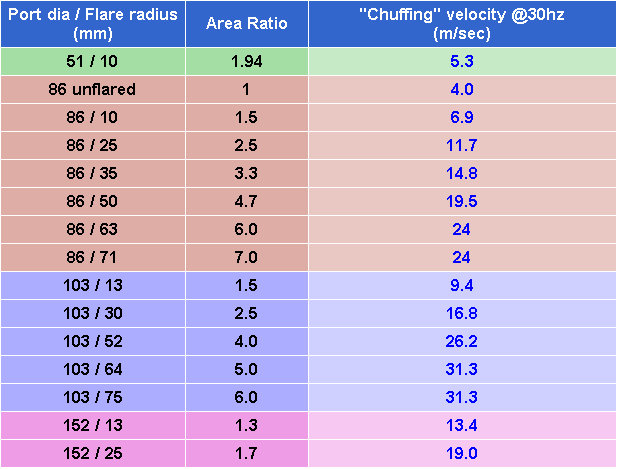
Summary of Rounds one and two 30hz data
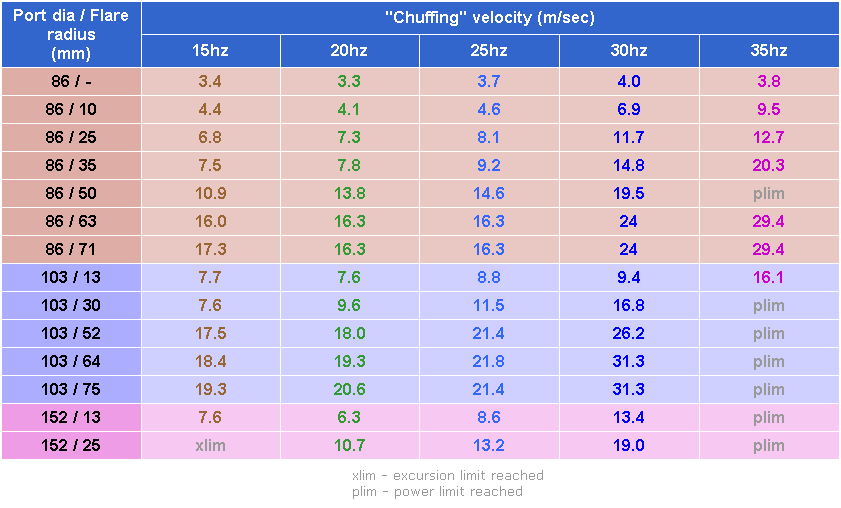
Rounds one and two data re-arranged and grouped by frequency
Round Three - 50 litre twin driver box 240w
Calculated Power = ( Voltage squared ) / 7
Round three data re-arranged and grouped by frequency