
Home Theater tips
Some simple ideas for improving your Home Theater System
Not all of us have the perfect room available for our Home Theater. Doorways, windows, and fireplaces can all mean compromises in where equipment can be placed. Here are a few ideas that don't cost the earth...
Room layout
Diffusers
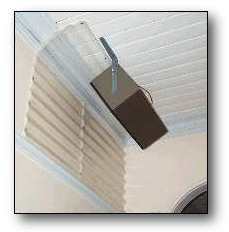
Diffusers are normally used on the rear wall, but in this case it is all glass and the seating is quite close to it, so three diffusers will be mounted on the front wall instead. If these are a success, two more may be built to fire the roof mounted surrounds into.
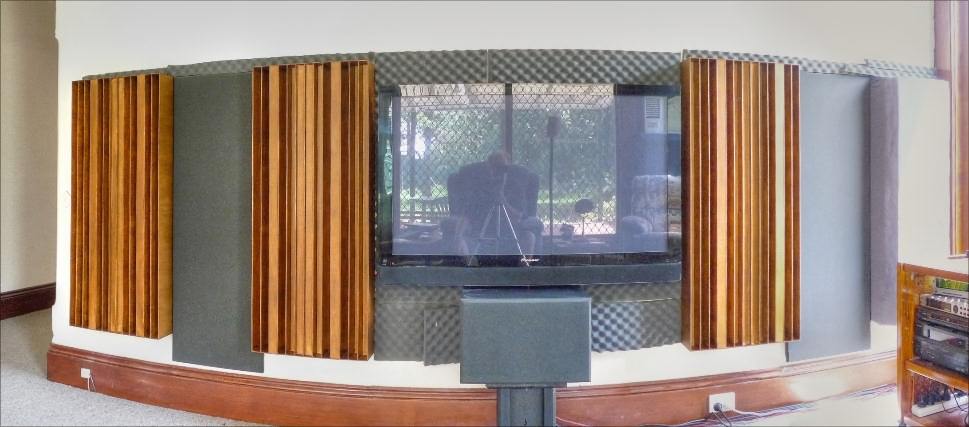
Wall mounted diffusers. Bass trap at RHS of picture.
These were designed using the recently completed QRDude calculator.
See the QRD Diffuser build page for all the details
The mains are hidden inside the IB manifolds. Purists would say this cuts down on the breathing for the IB
but it's got more than enough power for this little house.
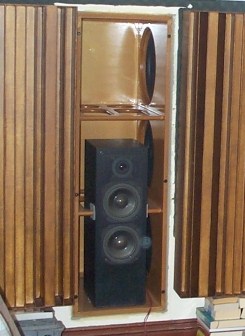
Richter Wizards soft-mounted in the manifolds
Bass Traps
The traps are 3 layers of 50mm CSR Bradford Ultratel - At 48kg/m^3, it's the Aussie equivalent to the popular OC703 used in the USA
It took 3 sheets to do the absorbers shown in the drawing at the top of this page (apart from the one in the middle of the side wall,
which is somewhere off in the future).

One of the smaller traps
If you can't stump up the cost of some bass traps, try some eggshell foam, which is around 90% as effective as acoustic foam.
(for high frequencies anyway..)
This is best sourced wholesale from your local rubber and latex dealer, who will charge you about 1/3 what an audio shop would.
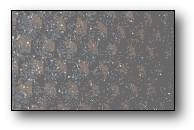
Eggshell foam
Rear speaker type and placement
This room is wider than it is long, meaning that the seating position is up against the back wall,
and the surround speakers will be to the left and right of the seating position.
Being so close to the back wall, bipole speakers
would tend to have echo problems with the rear firing driver.
The solution was to use conventional speakers mounted on the roof,
initially aimed at the seating position
Some articles on Dolby 5.1 and THX processing suggest that de-localising
the sound coming from the rear is beneficial. The surround speakers were turned around, and the sound bounced
off these polycarbonate panels made from some left-over roofing sheets.
It seems to work well for background sounds such as rain and crowds.
Some proper QRD diffusers are likely to replace these soon.
Bias lighting
Bias lighting is the technique of placing a light behind your TV screen.
This will provide background light via the wall behind the TV, and done correctly,
will increase contrast and reduce eye fatigue by moderating changes in brightness in the room.
Ideally, the spectral output of the light should be of a certain composition, which can be achieved
if you order your light from Cinemaquest who are the
experts in this field. The recommended brightness is 10% of the peak white level of your TV.
Quoting from their more detailed presentation....
Glare and reflections are then dramatically reduced, by eliminating any light source from striking the front of the set...
Colors appear richer and blacks are darker...
Contrast and brightness controls can be turned down. Doing this will prevent over-saturation of the phosphors, thereby preserving maximum sharpness and detail...
If you're on a limited budget, and don't want to import stuff from the other side of the planet, grab a cheap light dimmer from the local K-Mart and mount it in a box with a lead and an outlet socket. Use a lamp with one of the "bendy" necks to illuminate the area behind the TV - the results are great.
Before you make your own mains powered dimmer box, ensure that you are competent,
lest natural selection improve the species...

External links to more advanced treatment
Ethan's take on room treatments
Ethan's acoustic forum
Chameleon Panel Frames for DIY traps
HT acoustics articles
Forum dedicated to bass traps
Cardas Audio speaker position calculator
DecWare paper on room treatments
Modex commercial bass trap
Acoustic damping discussion thread at HTGuide
Studiotips forum - treating recording studios
Bob Gold's Coefficients for both US and Australian materials, plus tips incl tuning slat and Helmoltz absorbers
Room nodes Calculator from Bob Gold.
Measuring acoustic absorbtion
For Aussie builders, here's a discussion on building bass panels using local materials
If you want to tackle room nodes to get a more even frequency response, you will need some extra gear:
Room EQ Wizard software written by John Mulcahy. You will have to become a member at Home Theater Shack to access the software. (Membership is free) They also have a well supported set of discussion forums. The software will even upload the new settings into the BFD via the MIDI port on your computer.
John Sayers Recording Studio design forum
You can download the latest version for free by clicking this image