Routed Port Flares
The easiest way to make a port flare is to use a router
An economical, good looking flare can be made using a routed rollover at the port exit. The flare radius achievable with this method depends on how large a rollover bit you can find for your router. In Australia, the best you'll find is 13mm for a small router and 30mm for a large, table mounted router
Cross-section of completed port with routed flare
Initial cutout
Mount your router onto a circle cutting jig. I made my own, but your router probably came with a simple one. You could also purchase a Jasper jig. From the back of the mounting panel, plunge route a cylindrical cut the exact diameter of the port. It helps to practice on a piece of scrap to get the correct diameter. Cut the depth so that there is enough material left for the flare, plus a couple of mm
Flip the panel over, and from the other side, route a smaller hole right through. Make this 10mm smaller diameter than the port's internal diameter.

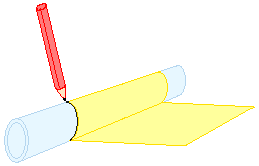
Mounting the pipe Cut the PVC pipe at 90 degrees. A simple way to get 90 degrees is to roll a piece of cardboard around the pipe. When the edges of the cardboard line up, mark around the pipe with a pen. A normal hand saw is fine for cutting PVC, and wanders less than a hacksaw

Glue the PVC pipe into position and leave till dry. If you are using a double thickness front panel, there will be enough surface area to just use PVA glue For more strength, fast setting epoxy can be used

Open up
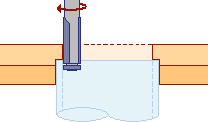
Remove the circle cutting jig from the router and fit a flush-trim bit. Use this to open up the hole in the panel to the same diameter as the pipe's internal diameter
Cutting the rollover
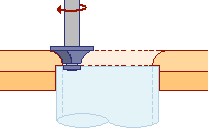
Fit the rollover bit and cut the port flare. The radius of the rollover bit will determine the flare radius
