Construction Tips
Glues- PVA glue dries hard and bonds well to timber, but by itself is
not particularly strong. For box building, use with edge bracing to
get a bond that is stronger than the timber itself. To ensure you get
100% cover with the glue, use a small craft paintbrush to spread it
fully on both surfaces. When laminating two sheets, such as preparing
a font panel for a speaker, use a wide scraper to spread the glue. It
is fine for internal ports, especially when the port is supported by
a brace. Not recommended for external ports.
PVA glue is available in Interior or Exterior grades. The Interior grade is not recommended for use with MDF, and is not sandable. Make sure you go for the Exterior grade, which is suitable for MDF, is sandable and is polyaliphatic, meaning that it is stronger and waterproof. In Australia this is sold as Selley's Aquadhere Exterior. In the US it's Titebond II. This is the most popular glue for building enclosures.
- Polyurethane glue is a foaming gap filling glue. It requires moisture
to initiate expansion and curing. For normal freshly cut timber, there
is enough moisture in the timber, but for bone-dry MDF you need to wipe
the surface over with a damp rag before gluing. Unfortunately this added
moisture reduces bond strength. Where voids are filled with expanding
foam, strength is also lowered. I tried this glue and wondered how well
all those little air bubbles would seal against pressure built up inside
a sealed speaker. One advantage of the glue is that excess glue squeezed
out from joints and cleaned up doesn't prevent the timber from accepting
stain in the way that PVA glue does.
I tried this glue on some ports and found that it didn't like to stick to the PVC.
In Australia it's sold as Selley's Aquadhere Durabond . In the US it's Gorilla glue
- Epoxy resin provides extra strength where a port may get rough
treatment, such as externally mounted. On the downside, it takes three
days to fully cure, and can be hard to clean up. If slightly less strength
is OK, the 5 minute epoxy is fine. I've used it to glue PVC port segments
together, where you need more working time than PVC glue will give you.
Handy tip: You can use vinegar for cleaning wet epoxy
- PVA Gap sealant is not very strong but more importantly, it shrinks.
Not recommended at all.
- Neutral cure Silicone Sealant bonds well but cannot be machined and will not accept paint or polyurethane
finish. It is good to use around all internal seams will ensure your
box is 100% airtight. Don't use normal silicone because it emits acetic
acid (vinegar) as it cures, which will eat your drivers and electronics! If you must use it, allow a few days for
the fumes to dissipate before mounting your components. See this
discussion for a bit more information.
- Construction adhesive bonds well and is strong but doesn't dry 100% hard.
This makes it impossible to sand and difficult to machine. The appearance
of the vents on the Blast Furnace was spoilt be this glue.
- Polyurethane construction Adhesive
I've not used this myself, but several reputable box builders in the
US swear by it. Glue and seal your box in one step. I've got my doubts
about exposed seams being able to be cleaned up with a router though.
- Hot melt glue is good to provide support, but can't be relied
apon for sealing. Handy for adding extra strength to internal ports. May also be used to attach grille cloth to frames.
- Contact adhesive
works well for gluing damping materials to walls, and for mounting grille
cloth. Rather than buy a tube, spend a bit more and get a tin, which
will last you much longer.Leave plenty of time for solvent based glues
to evaporate before closing up your box
- If you are still stuck for gluing ideas, I found a good site called "this to that" which although listing US products, is still helpful for any weird combinations of surfaces
Finishes
Melamine was used for the Beer Fridge sub
Melamine is chipboard that is covered with a white laminate, and is used extensively for kitchen
cupboards and shelves.
Exposed galvanised screws against the white surface looked quite industrial.
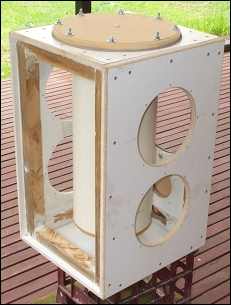
Melamine finish
In an attempt to soften the look, self adhesive fake woodgrain plastic was added. The effect was to turn an ordinary looking sub into a terrible looking one! ....should have stuck with the white.
Veneering was used for the Sidewinder sub
The sub was veneered with Blackwood and fitted with Californian Redwood top and bottom plates. 3 coats of "Estapol"
(Australian brand of Polyurethane), sanded between each coat. Finished
with a coat of Scandinavian Oil applied with a cloth.
The external vents were fitted after the veneering. Looks good, although the top surface
needed to be much smoother before beginning.
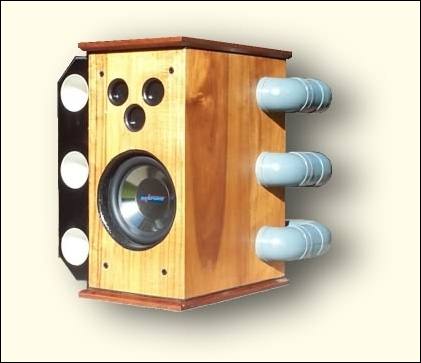
Veneered finish
The veneer cost around $100 Aus. You should read up plenty on veneering before beginning. There are some
good tips at Oakwoodveneer
If you live in Australia, Bunnings sells iron-on veneer in sheets 1200mm
long and 305mm wide in a range of about five timbers.
Plain MDF was used for the Blast Furnace sub
The cost and vent location made veneering undesirable, so I decided to just put a clear finish on
the MDF. Initially I put 3 coats of estapol and it looked just how I wanted,
but there were runs on the vertical surfaces and dust on the horizontal
ones. I think a finish that would be acceptable to potential buyers would
need to be sprayed on in a dust free environment.
In an attempt to fix the problem I sanded back again and wiped on a coat of Scandinavian Oil. Big mistake. The cloth left marks that were just as bad as the runs I had initially and the gloss level was now matt rather than full gloss. Worst of all, Scandinavian Oil takes 10 days to become "marr free", meaning a long wait before I could attempt a fix.
MDF with poly finish
I sanded back with "wet and dry" emery paper and then polished with an automotive polish that had the finest cut that I could find. The resulting surface is beautifully smooth but the gloss level varies where some of the oil is still present. After more than a fortnight finishing, I lost patience and fitted the electronics, finally enjoying the extra 7db over the Sidewinder. I don't think I will be using Scandinavian Oil again....
I recently came across WoodWeb, which has a really serious knowledgebase. Here's an excerpt:
Just fold the towel up in a pad like a handkerchief and apply using half of the pad. Again, don't over-wipe; just wipe on and then give a smooth wipe and move on to let it level itself. Practice briefly to get the knack. I can do table tops without brush marks or dust problems.
Also, with wipe-on poly you can apply another coat without sanding in about 1-2 hours (dry to touch). Wipe-on is thin coats, so it may take 4-6 coats depending on the look you want
I've built another speaker - another MDF box and have decided to try this method - my observations:
The above example was for a single flat surface such as a table - a speaker box also has vertical surfaces, so a it's not possible to put it on thick enough for "self leveling" to take place. I wiped on a 50-50 mixture with a cotton cloth (old sheet) folded into a square, using a circular rubbing motion.
The first few coats looked promising - good penetration and sealing. Once it came time to build up the depth, the problems became apparent. I was not getting a nice smooth buildup - the rubbing application tended to put down an extremely thin coat, but not evenly, resulting in a surface that could not be described as "glassy"
I abandon this approach, sand back with steel wool and apply one careful undiluted coat with a brush. This gives a good shine, but brush marks are a problem.
I also notice what looks like dust on the top of the speaker, however this appears to be minute bubbles generated by the brush itself. These are only visible when viewed at a certain angle, but can be felt when you run your hand over the surface.
I sand again and try the brush application with a 90/10 mixture. This gives a slightly better result, but the problems are still there, albeit diminished a little. Part of the problem with MDF is that there is no underlying grain to draw the eye away from these problems
Other tips I've tried recently include using a foam applicator rather than a brush, and to warm the poly by placing the tin in a warm water bath. This thins the poly allowing it to flow more smoothly. Still get some "brush marks" but not as bad. On the downside, the foam applicators are a throw-away item, and at $2 each, three coats front and back cost me $12.
Here's a tip that was sent in by Paul B. from Canada.....
Here's the trick:
Apply your finish, then while still wet, without applying ANY pressure, just the weight of the roller, run the roller across any areas that have bubbles. The roller should have just enough on it to be moist, but not wet. Speed and direction control make a big difference here. YMMV, but it has worked extremely well for me. Hopefully it does for you as well.
MDF
I use MDF (Medium Density Fibreboard) to build my enclosures. There is such
an animal as HDF (High Density Fibreboard), but is usually only available
in thin sheets suitable for laminating.
See this discussion at HTGuide
for a very good explanation of the differences between MDF, HDF and Hardboard
Grilles
My currently preferred method is to use silicone to fix the cloth to the frame. It gives plenty of working time and can be worked through the weave of the cloth better than contact cement. The basic grille has a 45 degree chamfer on the outside edge, and a rollover on the inside edge.

Painting the frame the same color as the cloth will prevent it being visible through the cloth. Since some adhesives attack paint, leaving the back face of the frame unpainted is a good idea. Holes for the grille clips are masked off prior to gluing.
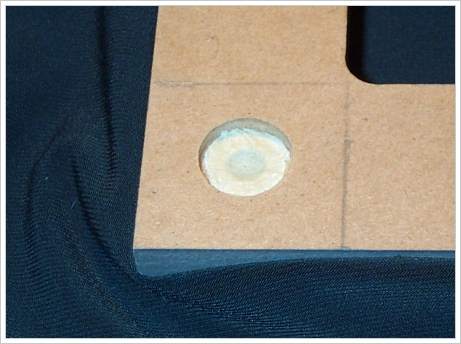
Cloth cut to size, leaving a generous excess....
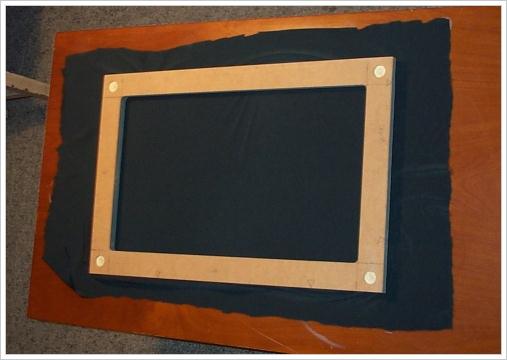
Run the silicone around the back face of the frame. Fold the cloth as if you are wrapping a present, and use string to lace the cloth up firmly. If you don't have a darning needle handy, you can use a bent paper clip - sharpen the ends on some concrete to prevent snagging.
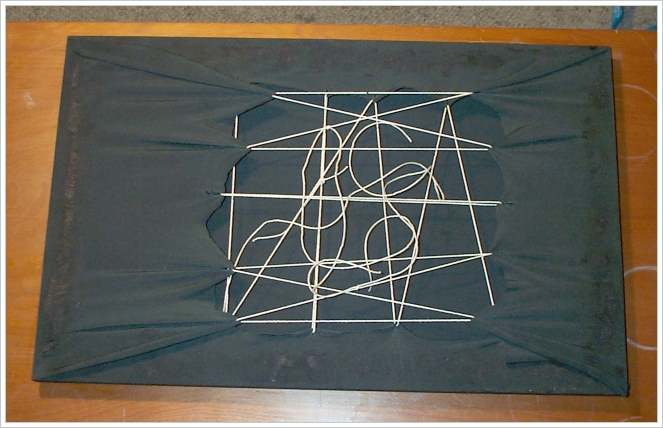
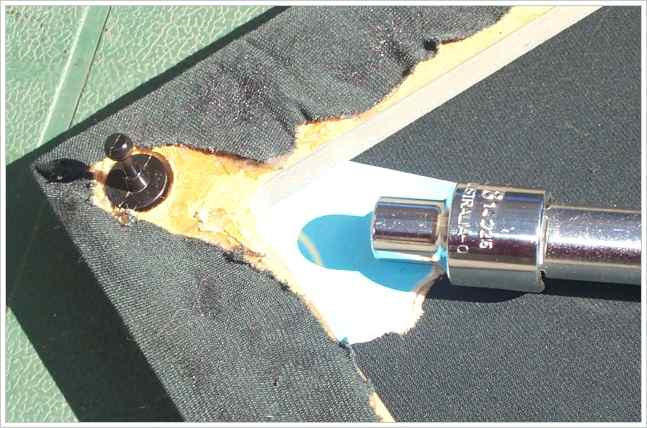
Give two days to cure and then trim up with a sharp blade. When fitting clips, a bit of PVA glue makes 'em permanent - put some cardboard between the cloth and the frame to catch any excess. An appropriately sized socket with extension and a hammer makes it easy to tap the clip into the frame.
Update! Getting the corners right is difficult. This can be made easier by doing it in several stages. Mask off the corners as shown below. On two opposing ends only, spread the silicone right to the edges. Wipe of any that gets onto the outside face of the frame.
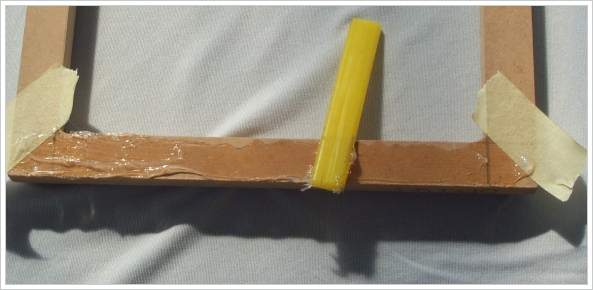
Remove the masking tape ready for the cloth
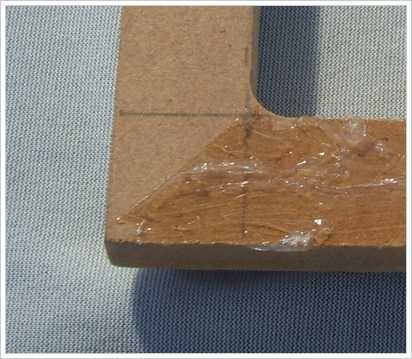
Lace into place. Push the cloth down into the silicone.
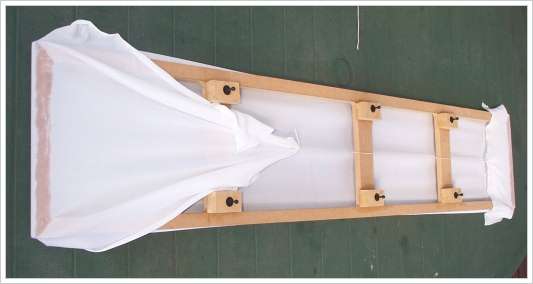
Give a full 24hrs for the silicone to set. Cut the excess away with a sharp knife, stopping just short of the corner. Unlike the earlier efforts, this one is glued right to the inner edge of the frame
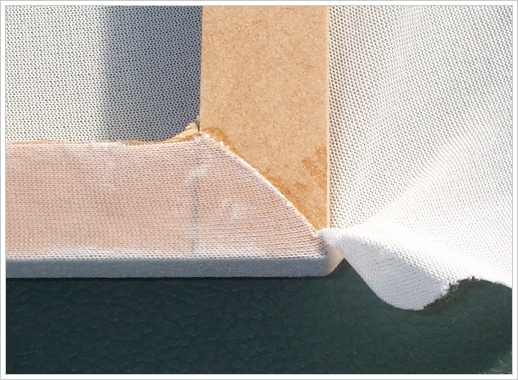
Now do the other two sides...
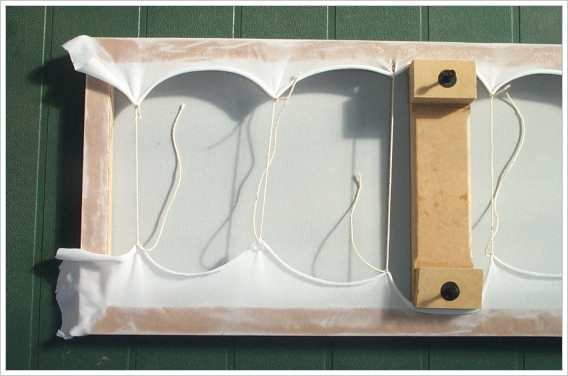
When it comes to trimming the last of the cloth, you may find that the corners are still not right. Leave some material as shown here
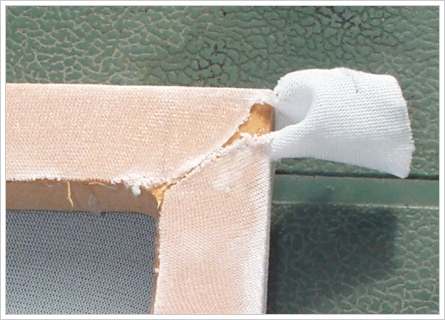
Apply some more silicone and tie off, pulling toward the center of the frame...
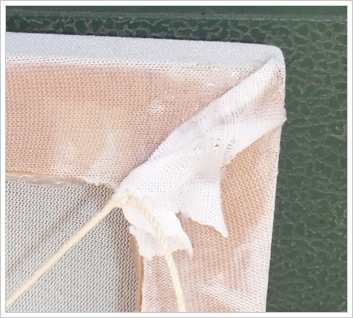
The final trim...
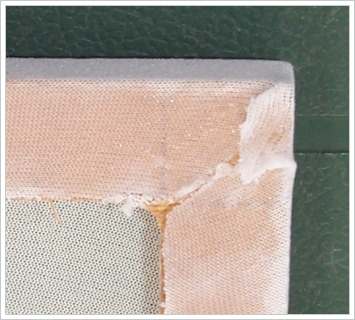
Finished product looks pretty good....
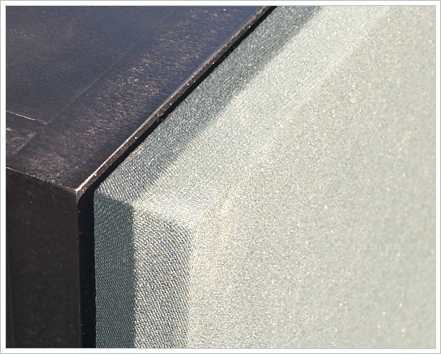
A quick note about "grille slap"
When you're designing the frame make sure the cloth can't be drawn against the frame with high airflow causing "grille slap" - the first time you hear it, you will think you have damaged a driver. For large grilles that need cross-braces, rebate out some material with a router so the cloth has some room to move.
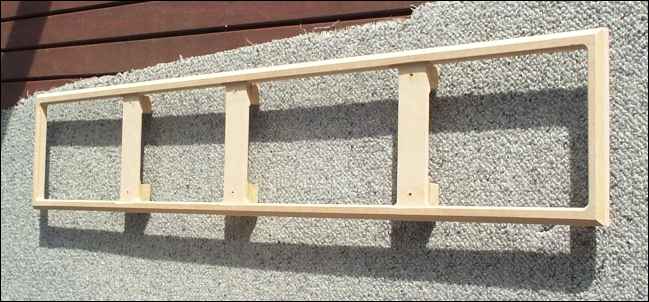
Other grille ideas
The Contact cement method
I hate it! After spending hours working on grille, lovingly making
cutouts and rollovers, rebates and countersinks, it all comes down to
a can of contact cement and 60 seconds of fear. There must be a better
way!
The main problem is that the contact cement doesn't allow you to "work"
the corners to get rid of any wrinkles. Some people use staples, but they
will split MDF, and they never look very professional
For an illustrated, step by step guide to using contact cement see the grille article at Human Speakers
The Hot-melt glue method
Another suggestion is to use hot melt glue rather than contact cement. Thanks go to Satansfx at AVSForum for that tip. Having one edge completely cured before moving on to the next one should make the job easier. Like the contact cement method, you would need to work quickly. The hot-melt begins to harden as soon as it hits the MDF.
The fly-screen method
Charles P from Atlanta, Georgia sent in this tip:
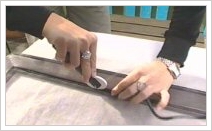
A quick trip to your local hardware store will yield some of that plastic tube that is used in DIY insect screens for your house. There's even a handy roller available to help push the tubing into the groove, as shown in this flyscreen repair photo
Purchase a custom made grille in metal
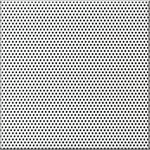
If you're in the market for a metal grille, have a chat to Dan Fowlks at reliablehardware. His custom speaker grilles are available in a range of meshes and colors, for what appears to be quite a reasonable price. He also stocks hardware for making road cases and rugged PA style speakers.
Tools
Whilst you could probably build a speaker with a hacksaw and a hammer, you'll find life easier with extra tools. I would suggest a router, a jigsaw, a power saw and an electic sander. Plenty of adjustable clamps come in handy. An electric drill with some "speedbore" bits is also good. The list is endless. In fact here is a link to a discussion on peoples favourite tools for building speakers - as you'll find, it's a long discussion!
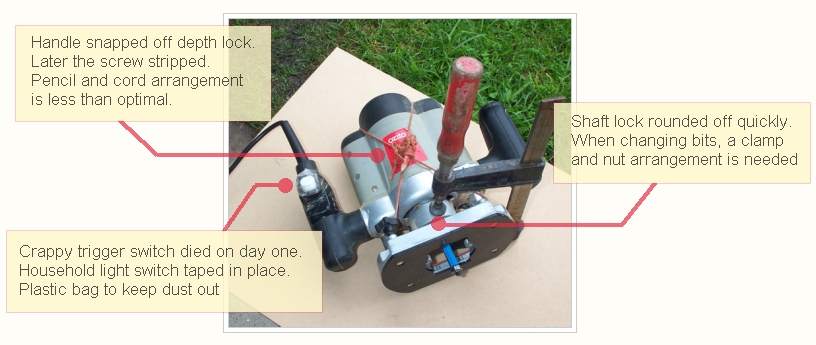
For quite a while I've used a cheap Ozito router. After six subs, the bottom bearing gave out, right in the middle of doing the boxes for a pair of infinite baffle manifolds. Needing to continue using my DIY circle cutter, I bought a second one. Only $88 from Bunnings, including some router bits. This time around I got the one made on a Monday! After a couple of subs, this is what it looks like....
I needed to get another circle cut, so the plunge adjustment was needed.......never say die!!!
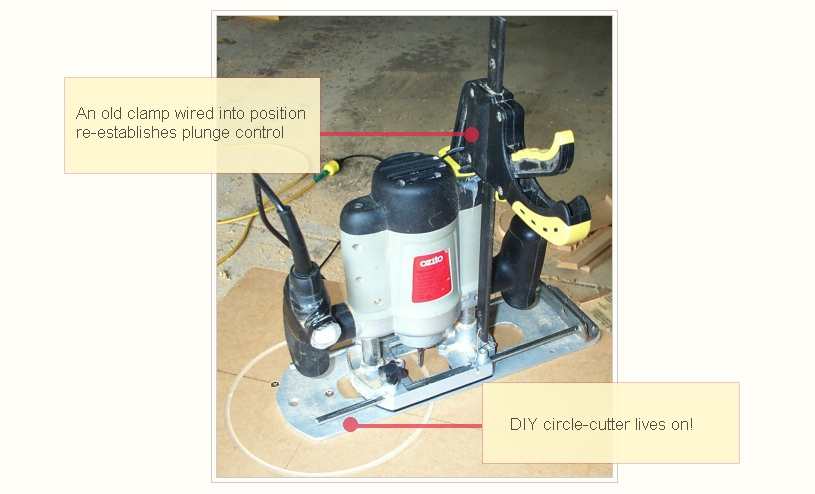
This all goes to show that you don't need to have the latest tools to finish a project.
There is a limit however, and I finally bit the bullet by buying a proper one - a Makita 3612C.
It's a lot heavier but will run the larger rollover bits. Recommended by many of the woodworking forums.

If you don't wan't to go to the trouble of making your own circle cutting jig, you could purchase a Jasper Jig. You can find these in Australia at Soundlabs.
There's a whole heap of woodworking tips at Highland Woodworking
Another site for tips on using a router and other power tools is New Woodworker
Clamps
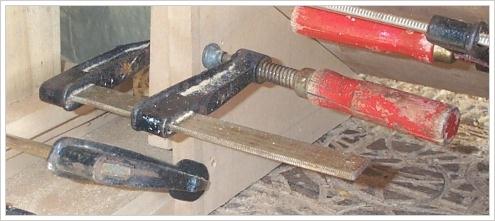
It's hard to go past the basic screw clamp. Very strong, and able to exert great force, get as many of these as you can
Ratchet clamps are great for one handed operation.
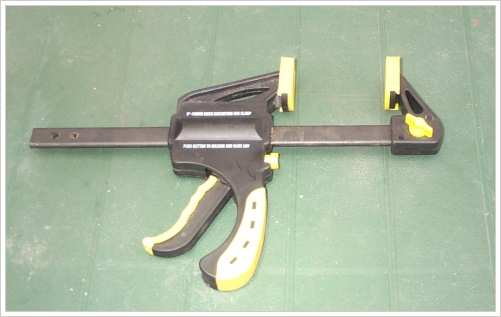
Don't try to do them up too tight though....
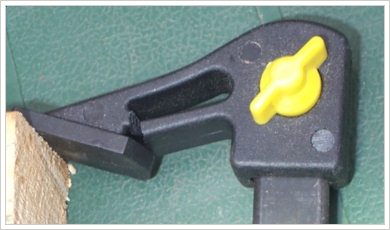
If you can get access to long clamps, you will love them!

Another clamp that would come in handy is a band-type clamp. These Merle Clamps looks like good 'uns.

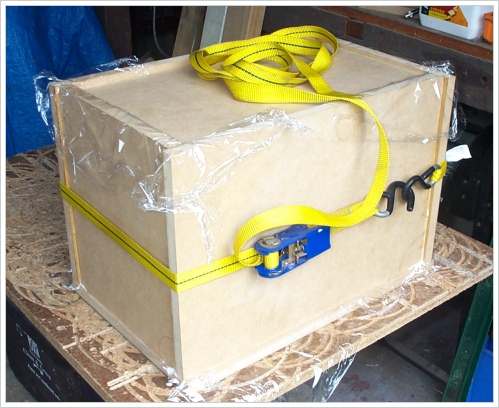
When your clamps are too small, you can find salvation using a ratchet tie-down strap....
Box assembly
I currently join the edges of my panels together with butt-joints, because they are strong when backed by internal edge bracing, and can be finished off with a flush-trim bit in the router.
I would love to have a go at mitred joints, but they appear to be fiendishly difficult to get right. I came across a router bit on the web called a "45degree mitre-lock" bit
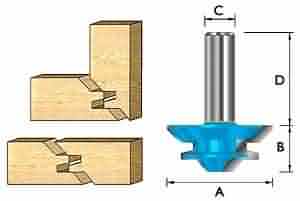
The bit is normally used with a router table, where one panel is cut with the panel lying flat on the table, and the other panel is cut with the panel standing upright. The "tongue and groove" effect locks the panels in place when gluing for a perfect result. Obviously, the panels must be dimensioned perfectly to start with, as there is no "flush trimming" to tidy up with afterwards. If I can work out how to use this bit with a handheld router, I might try one on my next speaker.
